
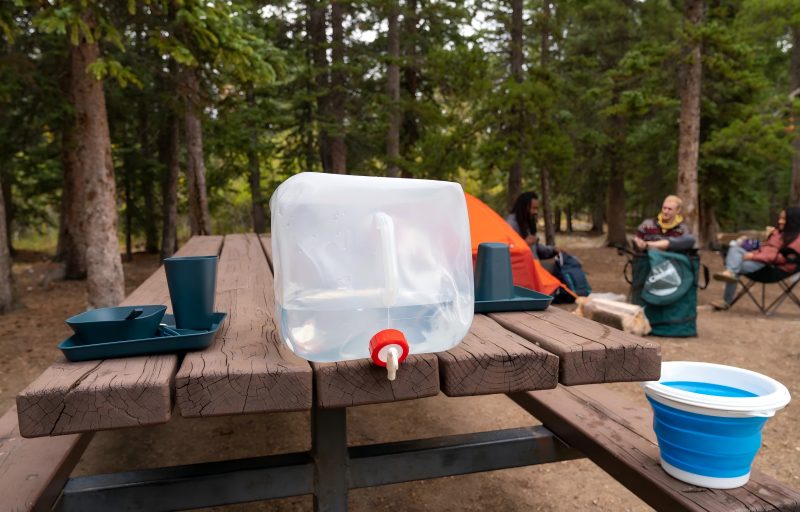
Collapsible water containers are lightweight, space-saving, and incredibly practical. Whether you use them for camping trips, home water storage, hiking, RV travel, or emergency preparedness, proper drying is essential. Moisture trapped inside a flexible container can lead to mold growth, unpleasant odors, bacterial contamination, and material degradation.
This complete guide explains why drying matters, how to dry different types of collapsible containers, and best practices for long-term storage. By following these steps, you can extend the life of your container and ensure it remains safe for future use.
Why Proper Drying Is Important
Unlike rigid water jugs, collapsible containers fold and compress, creating creases and hidden moisture pockets. These folds trap residual water, which can:
- Promote mold and mildew growth
- Cause unpleasant smells
- Encourage bacterial contamination
- Degrade plastic or TPU lining
- Shorten the lifespan of seams and valves
Even a small amount of moisture left inside can become a problem within 24–48 hours, especially in warm environments.
Step 1: Clean Before Drying
Before drying, always wash and sanitize your container. Drying a dirty container simply locks bacteria in place.
Basic Cleaning Process
- Empty all remaining water.
- Rinse with warm water.
- Wash with mild dish soap.
- Rinse thoroughly until no soap remains.
Optional Sanitizing Solution
For deeper sanitation (especially after long-term storage or emergency use), use a diluted bleach solution:
| Solution Type | Mixing Ratio | Soak Time |
| Bleach + Water | 1 teaspoon bleach per 1 liter water | 2–5 minutes |
| Vinegar + Water | 1:3 ratio | 10 minutes |
After sanitizing, rinse thoroughly with clean water to remove any residue.
Step 2: Fully Drain the Container
Proper draining is the foundation of effective drying.
How to Drain Effectively
- Open the main fill cap completely.
- Open any additional spouts or valves.
- Invert the container.
- Gently squeeze to push out trapped water.
Pay attention to:
- Corners
- Bottom seams
- Valve interiors
- Fold creases
Some containers have rigid spouts that retain droplets — tilt and shake gently to remove hidden moisture.
Step 3: Air Drying (The Best Approach)
The most popular and safest technique is air drying.
Method A: Hang Drying
- Open all caps and valves.
- Inflate the container slightly by blowing air inside.
- Use a hook or hanger to hang it inverted.
Benefits:
- Encourages airflow
- Prevents internal surface contact
- Reduces moisture retention in folds
Method B: Expanded Surface Drying
If the container cannot hang easily:
- Expand it fully.
- Lay it open-side up in a dry, well-ventilated area.
- Prop open the mouth using a clean utensil or drying rack.
Avoid placing directly under intense sunlight for long periods, as UV exposure can weaken some materials.
Drying Time Guidelines
Drying time depends on humidity, temperature, and material type.
| Environment | Estimated Drying Time |
| Dry indoor (AC room) | 6–12 hours |
| Outdoor shaded area | 4–8 hours |
| Humid climate | 12–24 hours |
| Using fan assistance | 3–6 hours |
Always confirm complete dryness by inspecting seams and smelling inside before storage.
Step 4: Speed-Up Drying Techniques
If you need faster drying, consider the following safe methods:
1. Use a Fan
Place the container near a circulating fan to improve airflow. This significantly reduces drying time.
2. Insert a Clean Towel
For large containers:
- Insert a clean microfiber cloth.
- Gently pat internal surfaces.
- Remove cloth and continue air drying.
3. Low-Heat Hair Dryer (Use With Caution)
- Set to cool or low heat.
- Maintain a minimum distance of 30 cm (12 inches).
- High heat can distort plastic, so never use it.
Step 5: Drying the Spout and Valve
The spout is often the most overlooked area.
Valve Drying Checklist
- Remove detachable spouts if possible.
- Shake out water from nozzle.
- Use cotton swabs to absorb trapped droplets.
- Leave cap off during storage.
If the container has a push-pull valve, pump it several times to release internal moisture.
Material-Specific Drying Tips
Different collapsible containers use different materials. Drying strategies should adapt accordingly.
| Material | Drying Consideration | Warning |
| LDPE Plastic | Dries quickly | Avoid extreme heat |
| TPU (Thermoplastic Polyurethane) | Flexible, moisture-resistant | Do not over-stretch when drying |
| PVC | Slower drying | Avoid prolonged UV exposure |
| Multi-layer Laminates | Moisture can trap in folds | Ensure complete expansion |
Always check manufacturer instructions if available.
How to Prevent Mold and Odors
1. Store Completely Dry
Even slight dampness can lead to mildew.
2. Add a Desiccant Packet
For long-term storage, place a food-safe silica gel packet near (not inside) the container.
3. Store in Cool, Dry Location
Ideal storage temperature: 10–25°C (50–77°F)
4. Avoid Folding Too Tightly
Fold loosely to reduce permanent crease damage and moisture traps.
Long-Term Storage Guidelines
If storing for months (emergency preparedness or seasonal camping), follow these extra precautions:
Storage Checklist
- Clean and sanitize
- Fully dry (inspect seams)
- Leave cap slightly loose
- Store inside breathable bag
- Avoid sealed plastic bags (trap humidity)
Emergency Use Considerations
For emergency water storage:
- Rotate water every 6 months.
- Dry completely before refilling.
- Inspect for cracks or weakened seams.
If mold appears:
- Discard immediately.
- Do not attempt reuse for drinking water.
Common Mistakes to Avoid
| Mistake | Consequence |
| Folding while damp | Mold growth |
| Sealing cap immediately | Trapped moisture |
| Using high heat | Material warping |
| Skipping sanitation | Bacterial contamination |
| Ignoring spout interior | Odor development |
Signs Your Container Is Not Fully Dry
- Musty smell
- Visible condensation
- Slight stickiness inside
- Dark spots in seams
- Cloudy interior surface
If any of these appear, repeat cleaning and drying process.
How Often Should You Dry It?
- After every use
- Before long-term storage
- After cleaning
- After emergency deployment
- Even if used only briefly, always dry thoroughly.
Extra Tips for Campers
When camping outdoors:
- Use tree branches to hang-dry.
- Dry in morning sunlight (short exposure).
- Avoid placing directly on soil.
- Shake out early-morning dew before packing.
Extra Tips for Home Storage
At home:
- Use dish racks for airflow.
- Place near kitchen exhaust fan.
- Avoid storage near sinks or laundry areas.
Extra Tips for Emergency Preparedness
For emergency kits:
- Label last cleaning date.
- Keep drying checklist inside kit.
- Inspect annually.
Advanced Drying Hack: Air Inflation Method
If you have access to a small air pump:
- Inflate container with clean air.
- Leave cap open.
- Allow internal airflow circulation.
This method dramatically reduces internal moisture in fold-heavy designs.
Hygiene and Safety Reminder
Never store collapsible water containers with residual liquid inside. Moisture plus warm temperatures create an ideal breeding ground for bacteria.
Always treat your container like food-contact equipment — because it is.
Final Thoughts
Drying a collapsible water container may seem like a small task, but it plays a critical role in maintaining hygiene, extending product lifespan, and ensuring safe water storage. Whether you’re a camper, homeowner, traveler, or emergency preparedness enthusiast, following the proper cleaning and drying steps prevents mold, odors, and contamination.
The key principles are simple:
- Clean thoroughly
- Drain completely
- Air dry fully
- Store properly
By investing a little time in proper drying, you ensure that your collapsible water container is always ready for your next adventure, household need, or emergency situation.